Getting Started
Hyvor Relay is an open-source, self-hostable email API designed for developers. This page will guide you through setting up your account and project, adding a domain, and sending your first email.
Cloud vs Self-hosted
When we say "Cloud", we mean the single official instance run by HYVOR at relay.hyvor.com. You need a HYVOR account to log in to this instance. At this moment, the cloud instance is not open for public signups.
When we say "Self-hosted", we mean any other instance that you or your organization has set up. You need the URL and OIDC credentials to log in to a self-hosted instance.
This documentation (/docs) is intended for developers working with any Hyvor Relay instance. Whenever relevant, we will note any differences between the Cloud and self-hosted deployments. If you are a system administrator who wants to spin up an instance, visit /hosting.
Console
Console (/console) is where you can manage your projects. Upon first login, you'll be prompted to create a project to begin.
Project
A project is an organizational unit that contains domains, suppressions, API keys, and other settings. One account can have multiple projects. Generally, you would create a project for each application you want to send emails from.
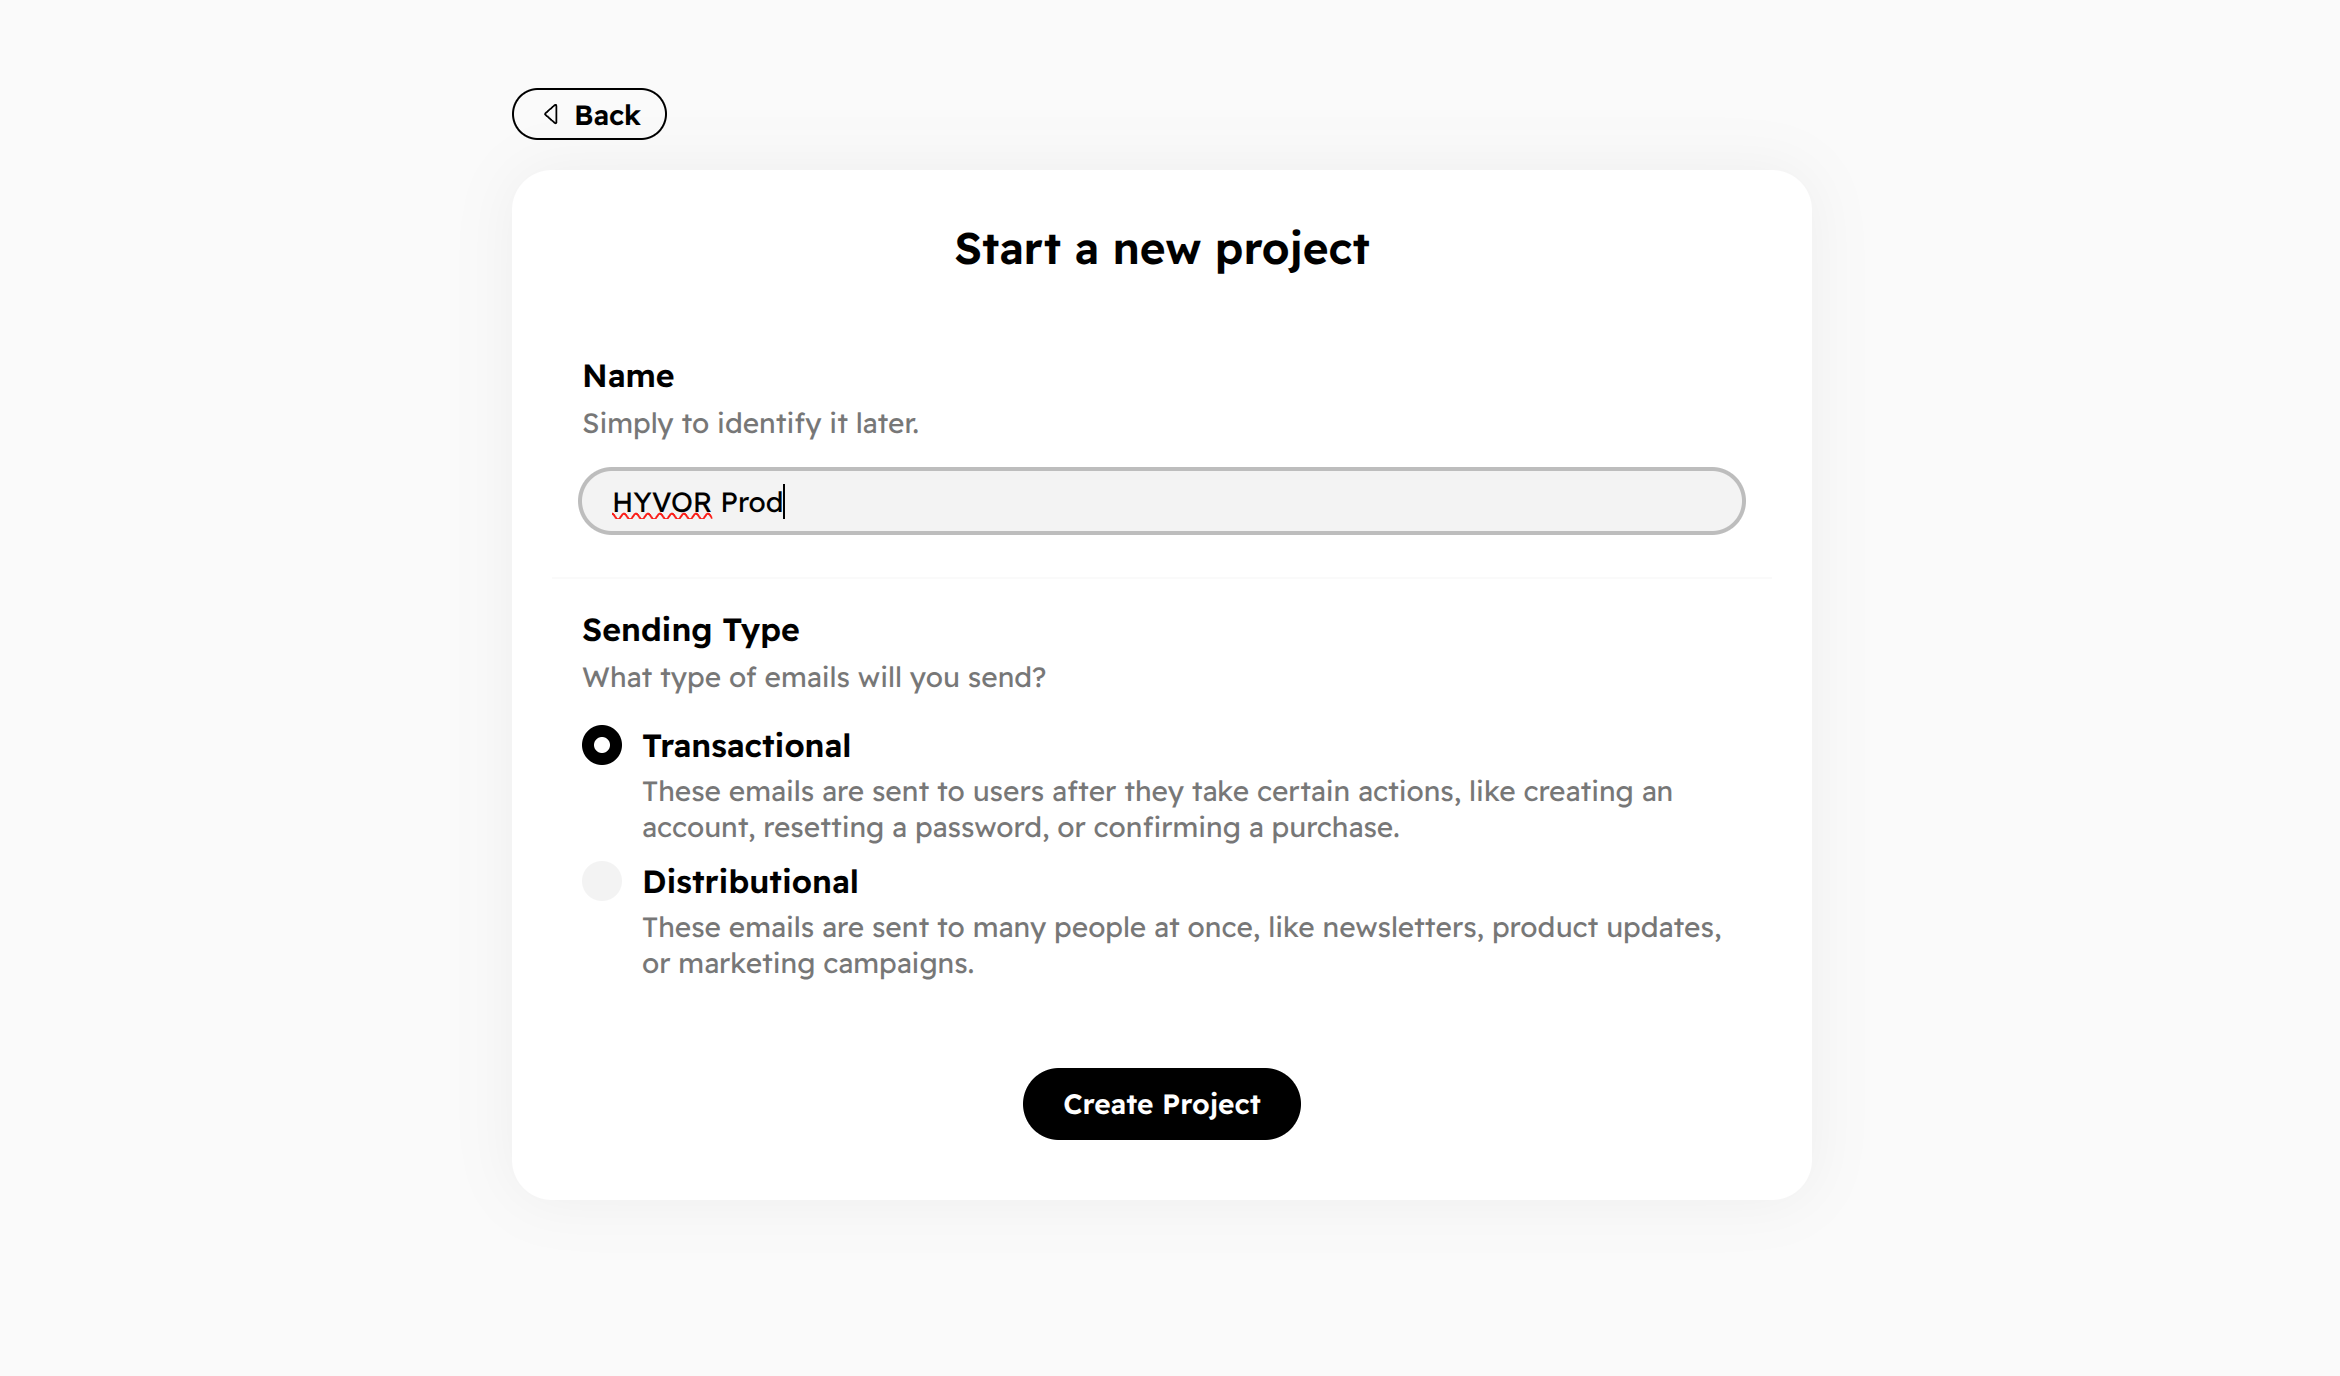
Note that a project can only send either transactional or distributional emails, not both. Each type of email is sent from different IP pools to maintain IP reputation separately.
- Transactional: These emails are sent to users after they take certain actions, like creating an account, resetting a password, or confirming a purchase.
- Distributional: These emails are sent to many people at once, like newsletters, product updates, or marketing campaigns.
Domain
To send emails, you need to add a domain to your project. Go to Console → Domains and add a domain. You will be asked to add a TXT record to your domain's DNS settings to verify ownership.
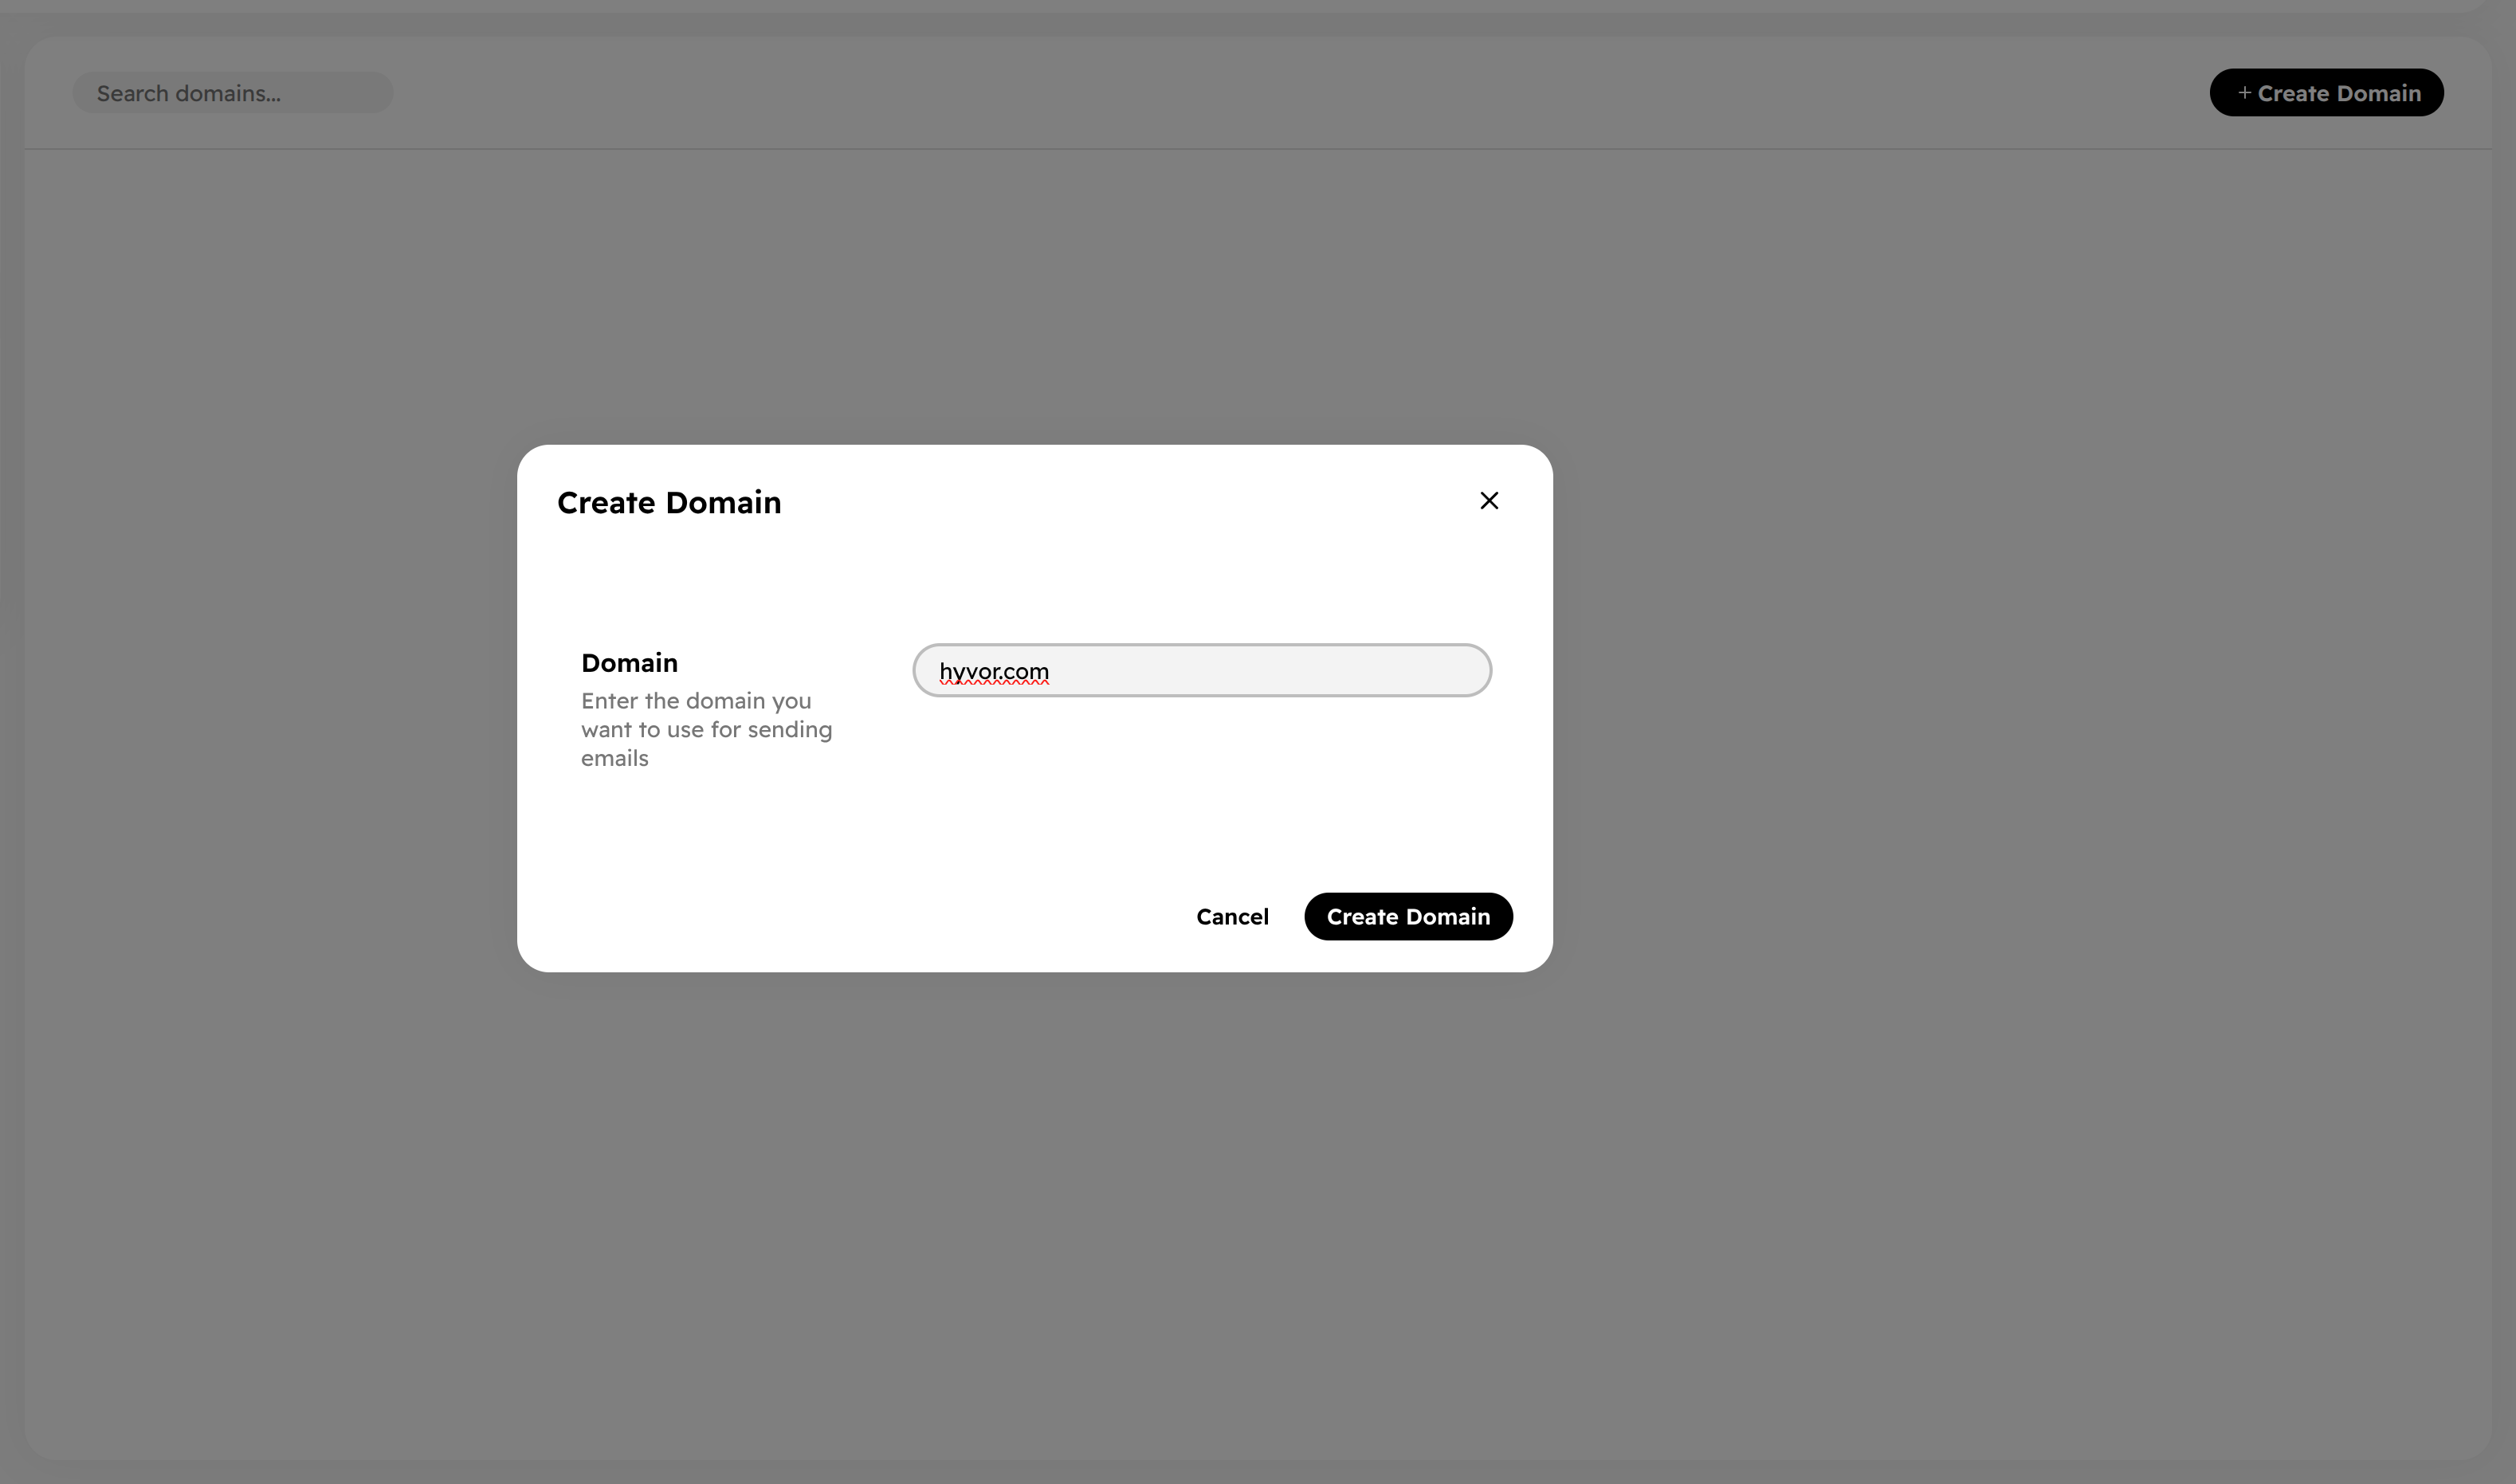
Visit the Domains page to learn more about domains, DKIM, and automating domain management via the API.
Send Emails
Once you have a project and a domain, you can start sending emails. Go to Console → API and create an API key with at least the sends.send scope for email sending. Make sure
to store the key securely, as it will not be shown again.
You are now all set to send emails using the API. Visit the Send Emails page for more details.
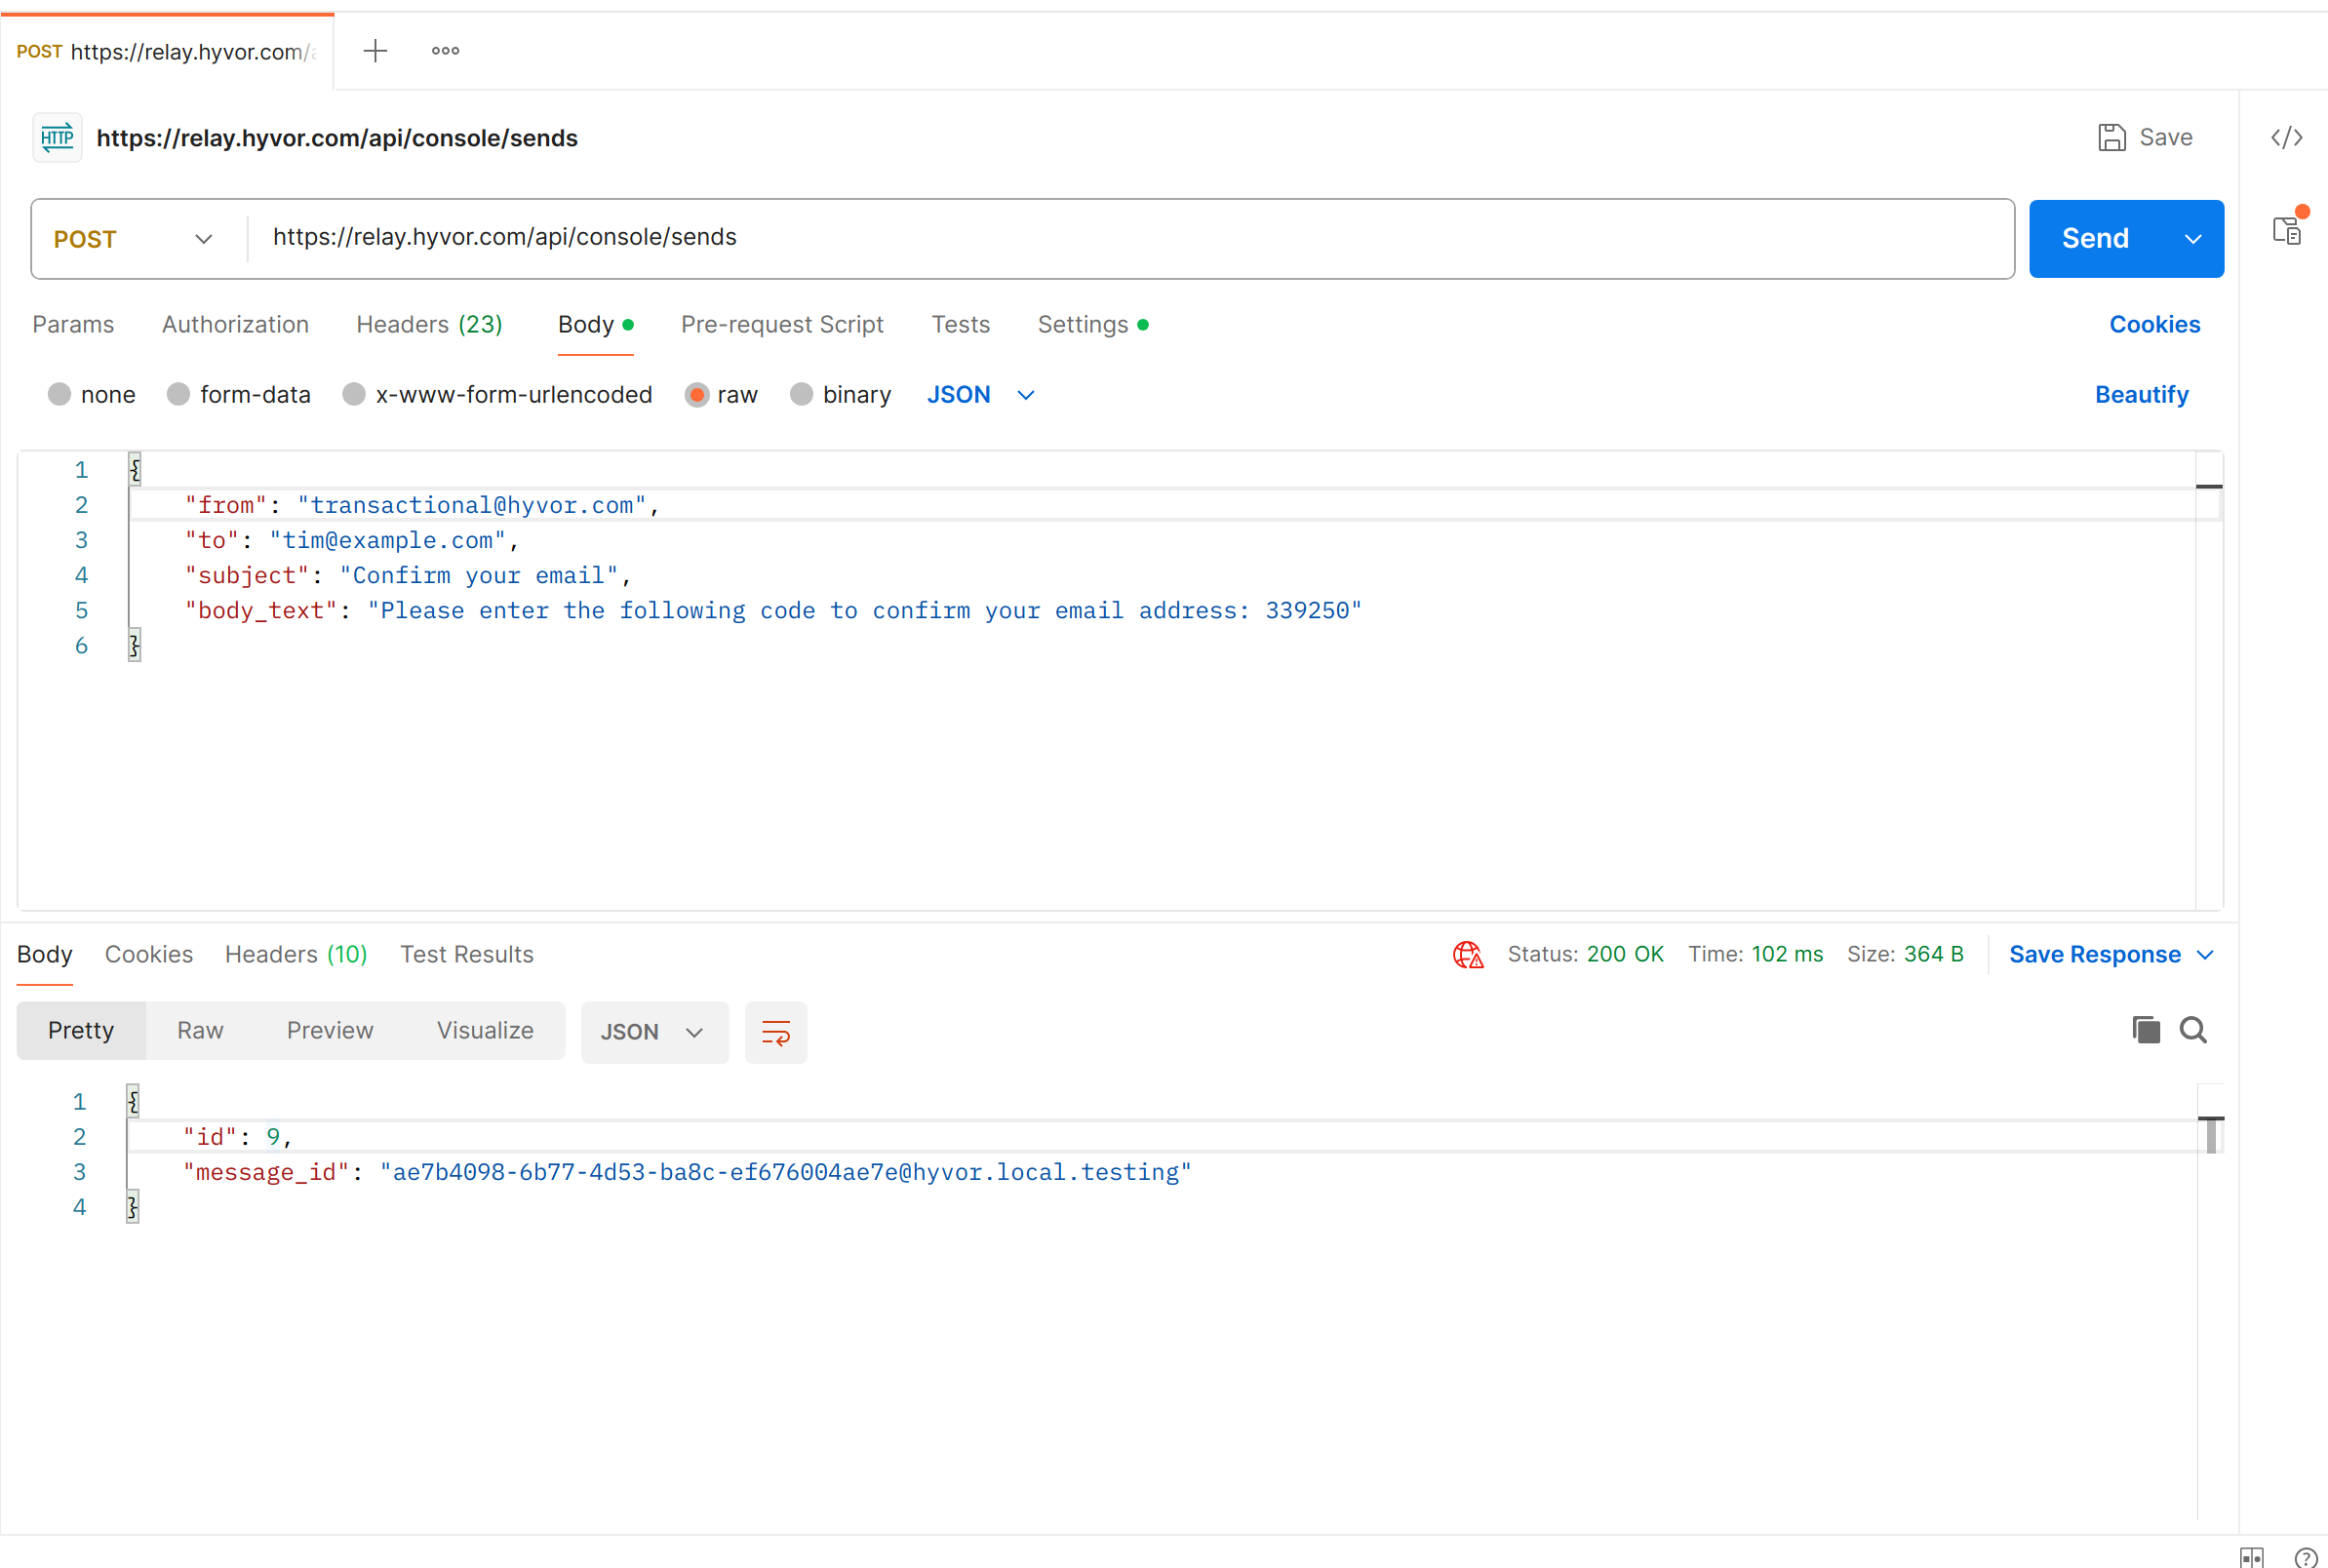
The Console API page provides more general information on how Hyvor Relay's API works and other API endpoints available.
View Logs
At Console → Sends, you can view the logs of the emails you send. The overview section shows the key details of the send and also the SMTP conversations between Hyvor Relay and the email service provider:
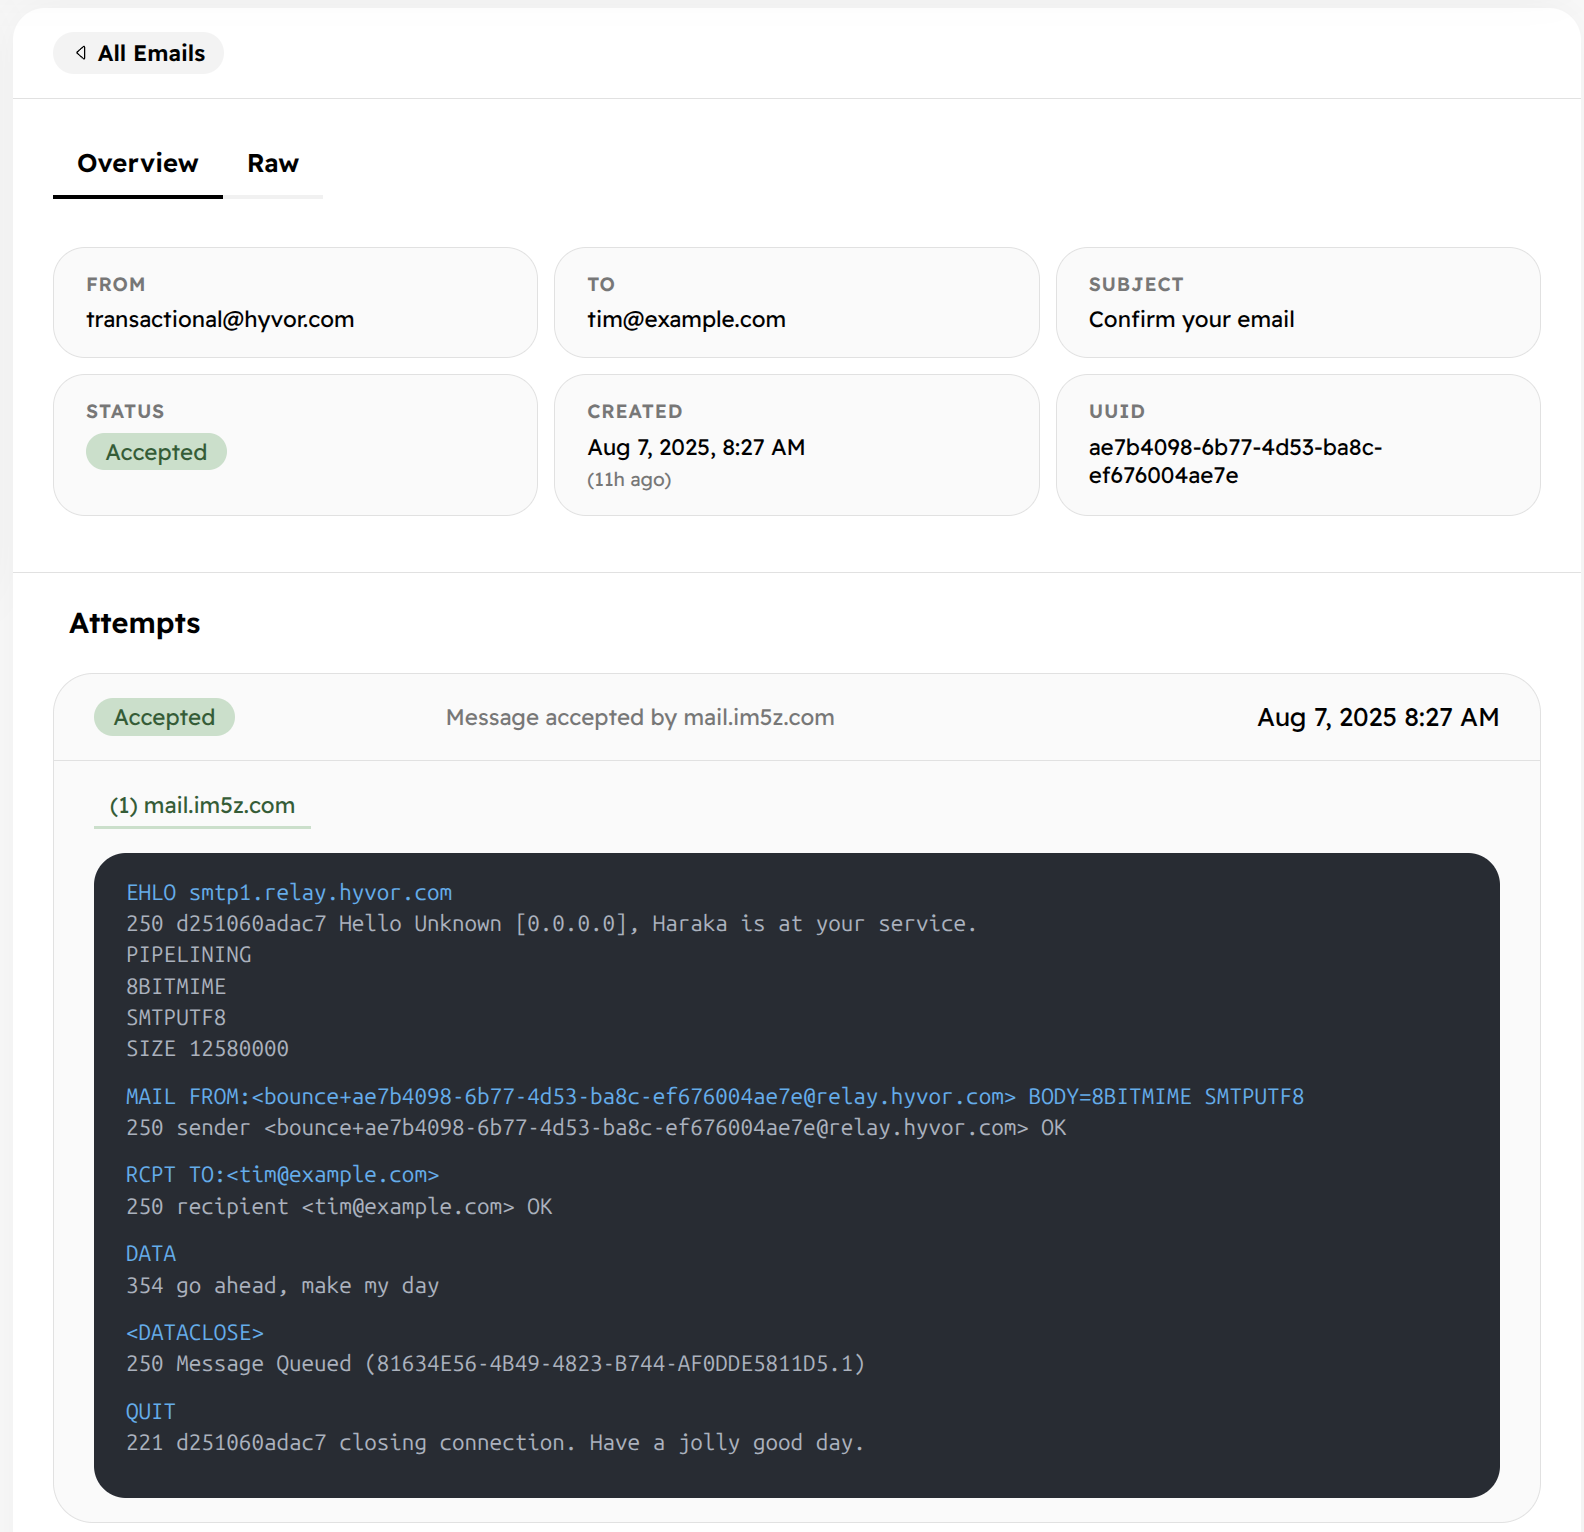
You can also view the raw email content in the Raw tab.